Dome Construction the Easy Way!
Just like with anything, when it comes to dome construction, there’s the hard way and there’s the easy way. Learn more about the easy way here…
>
 There are two ways to do most things. There’s the hard way, and then there’s the easy way. Sometimes, the easy way involves cutting corners and producing an inferior product. That’s probably where the phrase “taking the easy way out” came from. But there are other times when the easy way is also the best way.
Think of it this way. If you were about to make a cake, would you churn your own butter? If you did, would it make the cake taste any better? Probably not. Well, dome construction the easy way is a lot like that. It’s about using premade “ingredients” to produce the same result.
Our prefabricated kits make the process easy because we do all the dome construction for you. Here’s how it works.

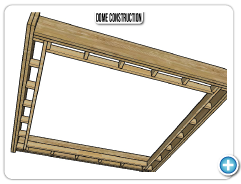

Starting the Dome Construction Process
Before we can start constructing your dome ceiling, we need some information from you. We’ll need the measurements of the box, which will essentially be the width of your dome. We’ll also need to know whether you’ll need a light ring. A light ring essentially illuminates the circumference of the dome, but it does change the dome construction a bit, so we need to know about it upfront. Let us know whether you want a soft dome or a half circle. The half circle is deeper. And finally, let us know where you will put the dome. Will it be in the master bedroom, in the kitchen or in an entryway? Mark the location and we’ll mark it on the box. We’ll take about five business days to build your custom dome kit, and then it’ll be on its way to your jobsite.
After Dome Construction is Complete
When your domed ceiling arrives, it’s time for installation. You’ll start by framing out the spot where you’ll install the dome itself. Check with your local code to be sure you’re using the right framing methods. If you have chosen an inner light ring, you’ll need to use 2x4 framing to frame the inner box.
The dome will arrive with detailed instructions, so you shouldn’t have any trouble taking it from here. In fact, as long as you know how to handle a tape measure and a nail gun, you’ll be a dome installing pro in no time at all. And if you do have any trouble, or if you want to see exactly how it’s done with your own eyes, check out our online video library for a full collection of how-to videos that cover everything after dome construction, from installation to drywall.


Once your dome is installed, you may want to check out our online photo gallery for some design inspiration. There are many things you can do to enhance an already decorative ceiling.