Range Hood Installation Tutorial With Youtuber Flipping Gorgeous
YouTuber Lena from Flipping Gorgeous TV shows us how to install an Arcadian Range Hood
If you've been looking for an amazing tutorial on how to install one of our Range Hoods, then do we have just the thing for you. We recently partnered up with Lena, a self-proclaimed "realtor turned renovator" who is the star of the successful Flipping Gorgeous TV YouTube channel , to show you just how easy installing one of our range hoods can be.
For this range hood installation tutorial she created a 3 part video tutorial which is available on her YouTube channel (of course!). Here we'll give you the play-by-play of how she did it. Watch the entire video series at the end!
DIY RANGE HOOD: PART 1: BUILDING THE FRAME
Step 1: Remove the existing cabinets and the old range hood
This is a necessary step in order to make way for the new range hood. Of course you'd skip this step if you're in new construction or have already demo'd the old range hood.
Step 2: Measure for the placement of your new range hood
In your range hood installation directions you'll receive from us it will show you what you need to do to make sure everything is lined up properly and is being installed in the right place.
As Lena demonstrates in this video it's a good idea to do a dry run by placing the back panel against the wall to make sure it fits accordingly. You can then trace an outline of the back panel on the wall to make it easier to attach. From here you can make any adjustments you need to make, in Lena's case it was drilling one hole for an electrical cord. Easy peasy!
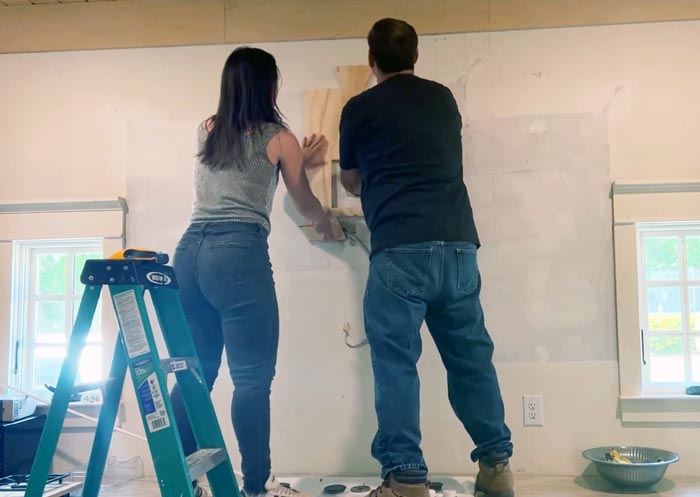
Lena and her dad check the fit of the range hood back panel (Screenshot from YouTube Video 1)
Step 3: Start assembling the range hood
Now it's time to start putting the puzzle pieces together. The pieces for the range hood will be precisely cut so that they have exact placements and interlock together.
From there you just need to screw the pieces together. The detailed directions will show you exactly where the screw placements should be. Lena being the experienced contractor she is decided to drill pilot holes to make the process go smoother.

After interlocking the pieces together, Lena's dad screws together the bottom section of the range hood (Screenshot from YouTube Video 1)
Step 4: Attach the range hood to the wall
The range hood kit is comprised of different sections. Each section is assembled and then installed in a specific order, starting with the top back panel.
After the top back panel is screwed into the wall, you'd then attach the middle back panel, in this case feeding the electrical cord through the hole you drilled in the previous step.
Once the middle back panel is secured, it's time to assemble the bottom section of the range hood and secure that to the wall.
These steps are repeated section by section until the entire frame is put together and securely installed to the wall.
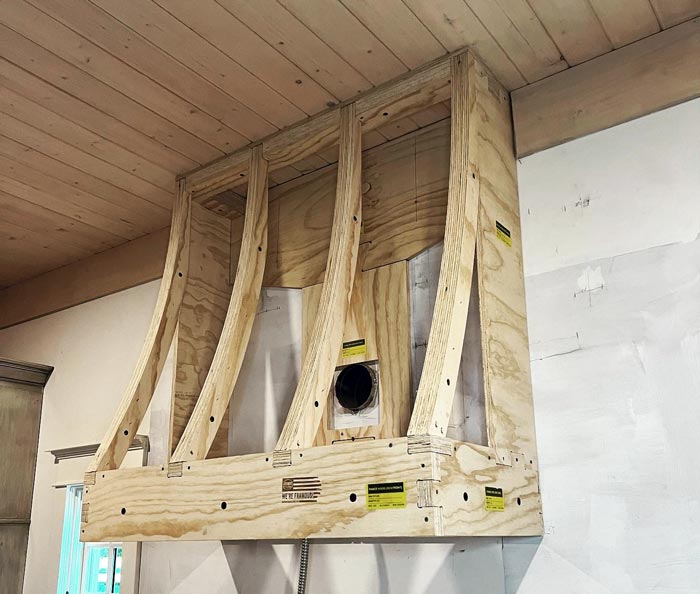
Step 5: Insert the vent and attach electrical
After the range hood frame is fully assembled and attached to the wall, it's time to insert your vent and connect the exhaust duct and electrical source to it.
The range hood frame is designed around the vent model you provide when you order the kit. This ensures a perfect fit and easy installation. If you're not sure which vent model to use for the style of range hood you like, we're more than happy to help you pick one!
DIY RANGE HOOD COVER: PART 2: DRYWALL FINISH
Now that you've got the frame assembled and your vent installed and connected, it's time to start with the exterior finish of the range hood. Our first step is going to be adding the drywall to the outside of the range hood frame. This will allow us to add the final finish to the range hood, in this case Lena chose to finish it with plaster. But the possibilities are endless when it comes to finishing, it's up to your imagination!
Step 1: Screw drywall sheet to flat sides of range hood frame
The best method here is to use pieces of drywall that are slightly bigger than the sections of the frame and then cut around the edges after screwing it to the frame. Since the sides and front are flat this is a pretty easy step.
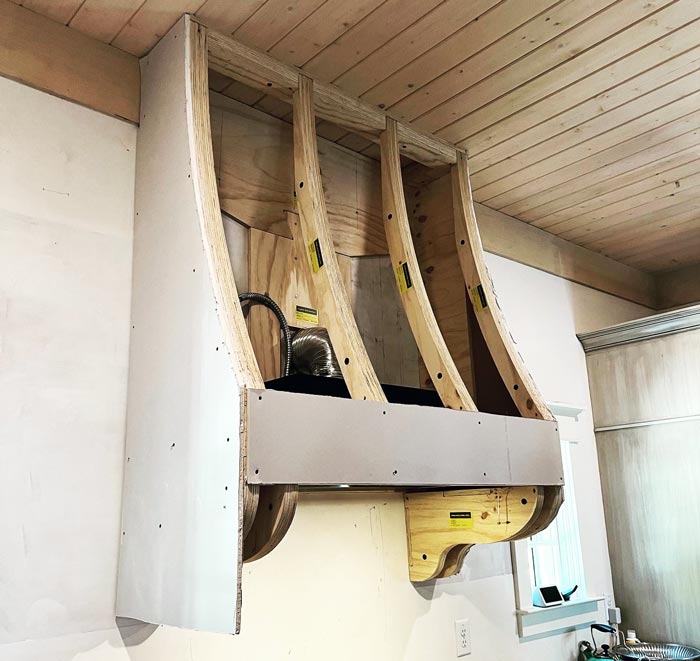
Partially trimmed drywall on the frame of the range hood. (Credit: Lena "Flipping Gorgeous")
Step 2: Score drywall for the curved sections of range hood frame
Depending on which style of range hood you choose, it may have rounded or curved components. For example, Lena is working with Arcadian Range Hood which features a downward sloping front. Other range hoods like the Modern Range Hood or Craftsman Range Hood do not have any curved sides, everything is flat.
Rounded sections get drywall just like the other sections, but the application method is a little different. In order to manipulate the drywall to fit a curved surface it might be necessary to score the back of it so that it bends but does not break.
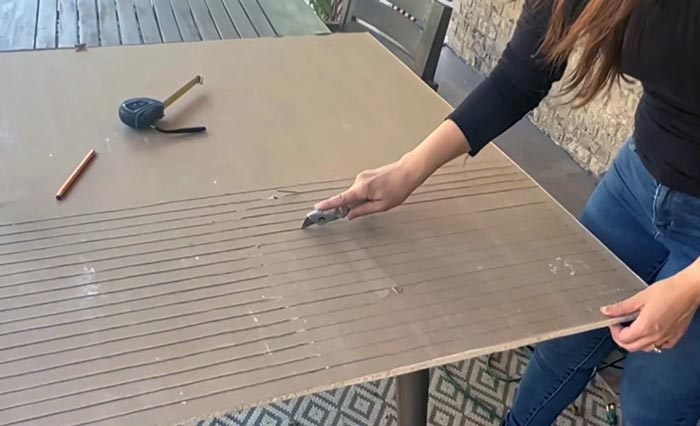
Lena scores the back of the drywall to make it pliable so it bends to the sloped front of the range hood (Screenshot from YouTube Video 2)
After you've scored the drywall you can now screw it to the frame just like you did with the flat pieces.
If you chose corbels for your range hood, the scoring method might be a little different because of the sharper curves. In this case, Lena scored the front and the back of the drywall in order for it to be pliable enough to wrap the underside of the corbels.
Not sure what a corbel is, check out our article on Corbel Arches .
Step 3: Trim excess drywall at the seams and edges
Using an X-Acto knife or box cutter trim off any excess drywall where two pieces of drywall meet. This allows for the drywall to be flush with each other at the seams and gives it a cleaner and finished look. This is also important for the next step so your joint compound has a cleaner surface to stick to.
Step 4: Taping and joint compound application
Now that the frame has been covered in drywall it's time to seal everything up and get it prepared for the final finishing phase. For this step we recommend using joint compound, as it's better suited for drywall.
You'll want to apply joint compound to the seams (where the drywall pieces meet) as well as to fill in any screw holes. You can apply tape to the seams first if you want, but it's totally up to you.
If you have corbels like Lena does for this range hood, it's a good idea to tape the gaps on the front of the drywall that were caused by the scoring. After that's all been taped you'd then apply joint compound on top to seal everything up.
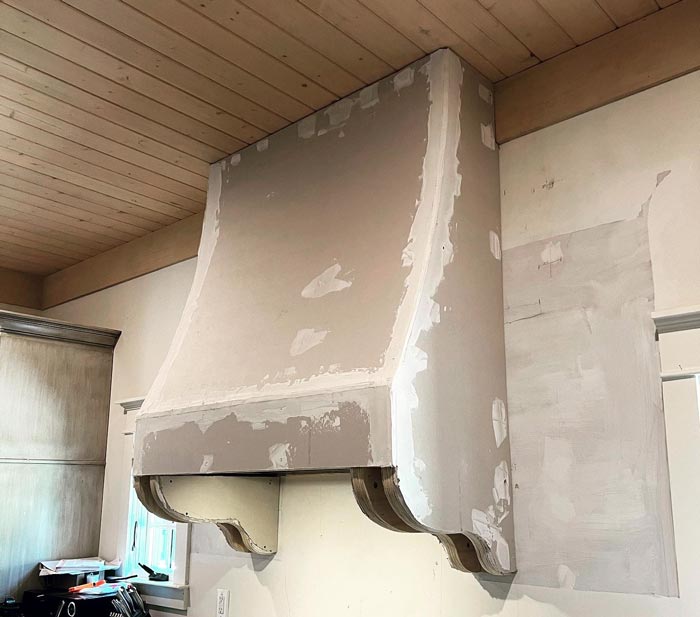
The range hood frame after drywall, taping and joint compound applied. (Credit: Lena "Flipping Gorgeous")
Step 5: Apply corner beads if necessary
Depending on how the taping and joint compound turned out you may want to add corner beads to the edges for a smoother seam. Lena picked up some rounded corner beads at Home Depot and easily applied them with some spray adhesive.
After your corner beads are affixed you'll want to go over them with a layer of joint compound in order to give it a smooth finish. At this point your range hood frame should be sealed up with tape and joint compound.
Step 6: Sand and prime the range hood frame
After you've finished with the joint compound it's time to sand and paint. For this you don't need an expensive electrical sander, something like sanding sponge should do the trick. You'll want to to go over the areas where you have joint compound so they're smooth and blend into the drywall.
Once you're done sanding you're probably going to want to use some primer, but that may be dependent on your final finishing material. Lena is going to be using venetian plaster and for this material it's a good idea to use some primer. If you're finishing with something like stone, you probably don't need to prime.
DIY RANGE HOOD: PART 3: APPLYING VENETIAN PLASTER
Now that the range hood is sanded and primed you're about to start the home stretch of the finishing process. At this point the next steps might differ depending on how you plan to finish the range hood. Lena is going to be using venetian plaster, but these steps would be applicable for other similar finishes. If you're going to be finishing the range hood in another material (like stone for example) this last phase would be quite different.
Step 1: Use painter's tape to protect other surfaces
Like with any sort of painting project you'll want to tape off the surface areas you want to protect. Here Lena adds painter's tape to the walls around the edges of the range hood frame. Depending on how your range hood is installed you may also need to tape off the ceiling like she did.
Step 2: Apply a skim coat
When working with a material like venetian plaster it's a great idea to add an initial coat to help the final coat adhere better, this is called a skim coat.
Using a trowel, apply the plaster to cover the entire frame using alternating motions for the desired look and consistency. For smaller areas it's probably easier to use a putty knife instead of a large trowel, applying the plaster like you would spackle.
Step 3: Apply the texture coat
After the skim coat has dried (about an hour or so) you can now apply the texture coat, or the finishing coat. This will be the last coat you apply and will be in whatever style you decided on. Lena is going for a particular look so she used a special technique called "skipping" in order to achieve her desired texture.
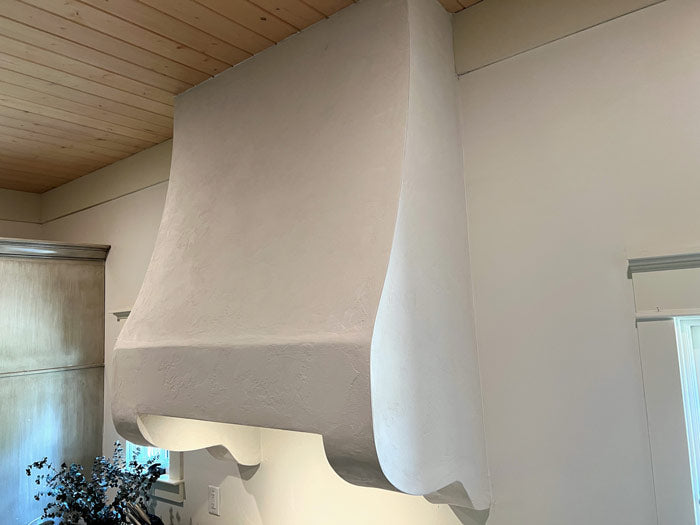
Range Hood with a textured venetian plaster finish (Credit: Lena "Flipping Gorgeous")
Step 4: Smooth out the texture if needed
After letting the finishing coat dry overnight, Lena wanted to smooth out the plaster some because it was still a little rough to the touch. For this she used a round 200 grit sanding pad to lightly go over the surface buffing out the rough spots. This kept the look she was going for but gave her a smoother surface.
if you're going to be buffing our plaster it's advisable to wear a mask so you don't breath in any of the dust particles.
Step 5: Apply any finishing accessories (optional)
Depending on the look you're going for, at this point your range hood might be completely finished. And if so, then congratulations!
But for some people you may want to add a little flair to the range hood, and this is the time to do it. Lena toys around with adding some wood elements to the front of range hood, but holds off until some other projects are finished to make sure it all works together.
Some other range hood finishing options could include a stripe of paint for a pop of color, perhaps some mosaic tile, or even some metal to dress up your range hood. It's totally up to you!
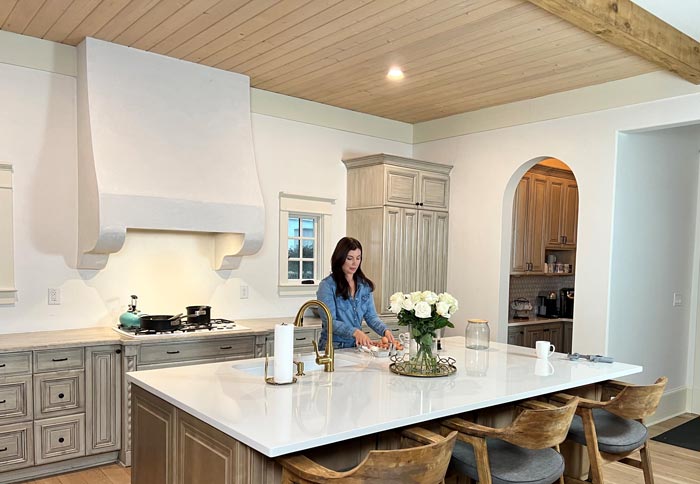
Lena stands in her kitchen with her finished Arcadian Range Hood (Credit: Lena "Flipping Gorgeous")
Range Hood Installation Tutorial - Wrapping Up
We hope you've found this tutorial useful and it has given you some inspiration for adding a custom range hood to your kitchen. Our pre-fabricated kits are designed to your specifications and come complete with easy-to-follow instructions. As you can see, you don't need to be an experienced contractor or have to use any special materials or tools.
If you have any questions on designing a range hood or are ready to order one now, don't hesitate to contact us ! We're happy to help you through the whole process.
Not sure which range hood you might like, view our entire collection of range hoods here .
Want to watch the full video series?
Our greatest appreciation goes out to Lena for this amazing video series on how to build and install a range hood. Her instructions are amazingly clear and she shares a ton of nuggets that will help you in your next project. We couldn't be happier with how her range hood turned out!