Building a Cyc Wall the Easy Way

Professional photographers and commercial advertising photographers require a lot of very specific equipment. They need to keep all of their camera and lighting equipment up to par year after year, but that’s not the only concern they have. Their studio often includes a cyclorama wall; a wall that provides perfect lighting and no horizon line. Cyc walls are also often called infinite walls because they seem to simply fade in all directions with no definite horizon. Perhaps you've also seen a cyclorama wall in a theatrical production ? Well, today we’re going to show you how building a cyc wall can be easy.
Preparing The Cyc Wall
Frame Your Regular Wall
Build a wall just like you would if you were building a standard wall. Your studs should be 16” on center to maintain the structural security you need. Skip this step if you are building a cyc wall into an existing room. If you’re building into an existing room, you’ll need to remove the drywall to expose the studs.
Remove the Right Angles
The goal of a cyc wall is to hide the right angle intersections. Your finished cyc wall will have no visible seems, like the interior of an uncracked egg. We achieve this by installing half-radius, roughly one-fourth of a circle, bends in every right angle, effectively removing all hard corners.
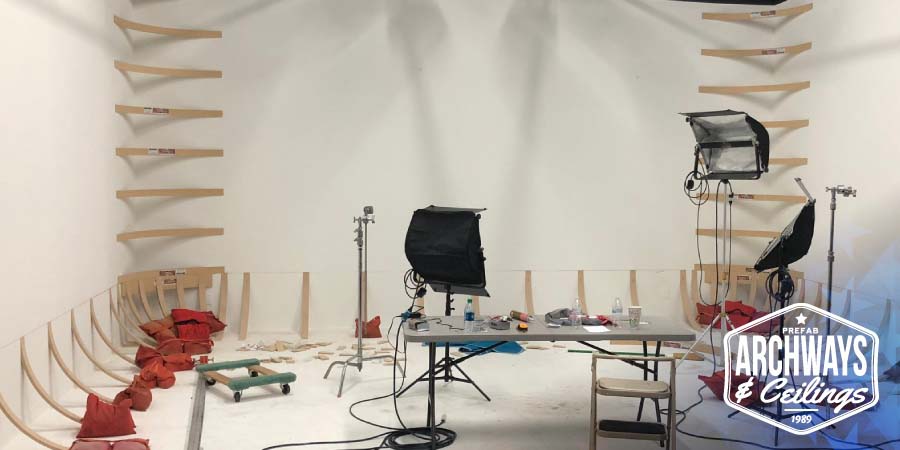
Create the Curves To Begin Forming The Cyc Wall
Drywall is designed to be installed to a perfectly flat surface. But it’s actually quite easy to bend when you wet the back with a sponge and then lean it against a wall to begin curving (sagging) under its own weight. Do this a few times, and it will be much easier to work with.

Finish the Corners
The corners are the most difficult part of the installation because of the unique shape and required bend. Consider using a double layer of 1/4” flex drywall instead of 1/2” drywall for the corners. Some builders use chicken wire and plaster. This method works as well, but requires significantly more drying time due to the amount of plaster used.
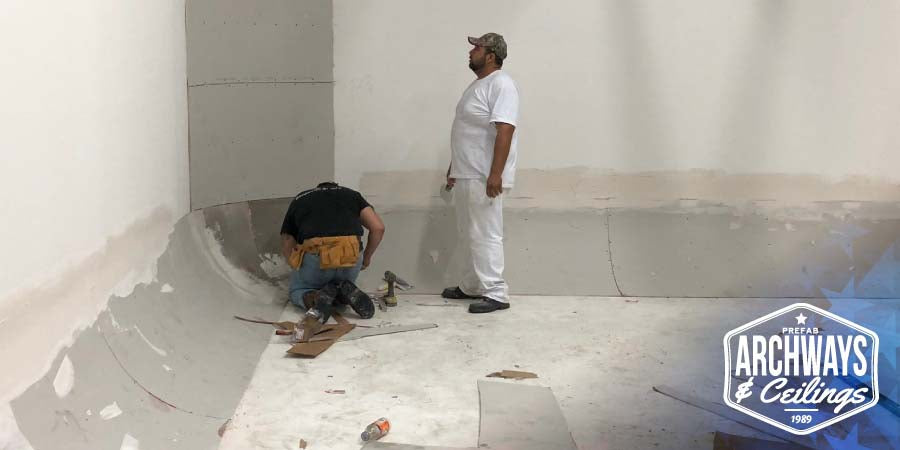
Tape, Mud, and Sand
Once you’ve finished installing the radius and creating the drywall bends, it’s time to tape it all up. Use drywall tape like you normally would when building a wall. Apply the plaster, smooth it as much as possible, and allow it to dry. Sand the entire cyc wall to a perfectly smooth finish. Reapply drywall mud as needed to achieve the smooth finish you need.
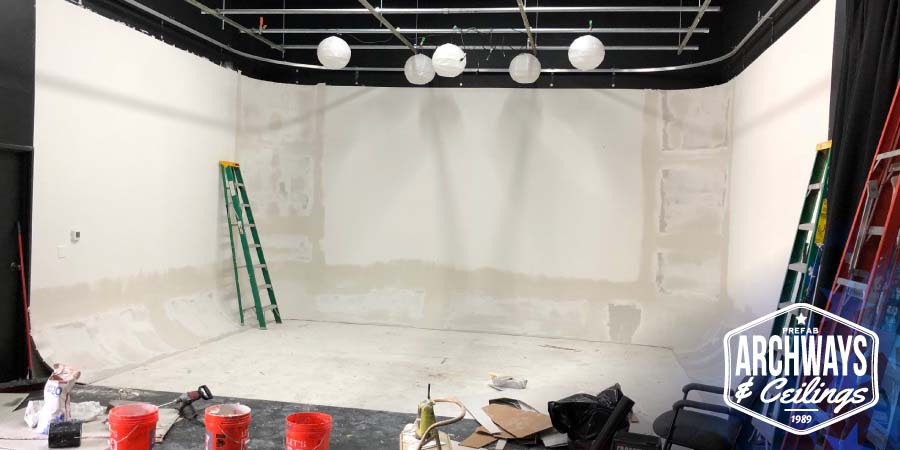
Finishing The Cyclorama Wall Building Process
The final steps to complete your cyc wall project.
Painting The Cyc Wall
Finally, you’re ready to paint! Every photographer or videographer has different requirements for the cyc wall for different projects. The most common paint to finish the cyc wall is eggshell white or satin white. You don’t want a lot of sheen because of the way it allows light to jump around.

Building a Cyc Wall Is Easier Than You Thought
You may be thinking that it would be easier to buy a preformed fiberglass cyc wall; and you’re right. It’s easier, but quite a bit more expensive . If you're thinking about building a cyc wall yourself, we hope you have experience as this is tough and very time consuming. Now, if you're looking for an affordable cyc wall kit that is customize-able to your needs, easy to install, and will save you hours of work, then take a look at our custom cyc wall kits . Each order is custom designed based on the measurements you provide while ordering. Call us at 877-303-2263 if we can help you with any part of the order process.